
Hello Sewists!
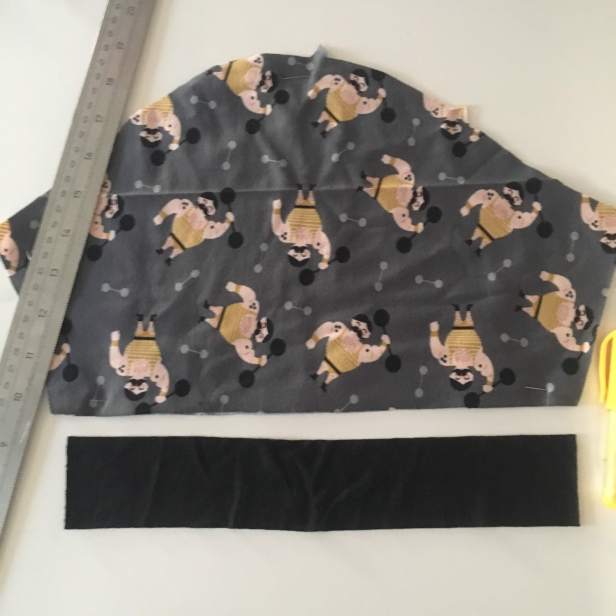
I just LOVE this fabric! We were visiting family in Bristol over Easter and my sister in law took us to Like Sew Amazing. It’s a beautiful shop with a very well curated selection of fabrics… MrA spotted the strong man jersey and bagged it for himself immediately! I got some lovely cotton for shirts and a soft grey/green marl wool jersey which will make the comfiest sweater – we both agreed that it was possibly one of the finest, most concise fabric curations we had seen. If you’re in the Bristol area, definitely pop in!
I’ll admit that this shirt was a pretty quick and easy make for me. I’d used the paper pattern before, so knew that it fit well. And, let’s face it, I’ve made a few Tshirts! Even so, there is always a lesson to learn (or in this case, re-learn). I always stick to the same order when I make a t-shirt:
- Sew & overlock/serge the shoulders (press seams to the back)
- Attach the neckband (baste, sew, overlock/serge seams)
- Attach sleeve cuff, finish seams and press towards sleeve – if no cuff, press to mark sleeve hem.
- Sew and overlock/serge sleeves (press seams away from sleeve)
- Sew under arm and side seams, finish and press to the back.
- Switch to twin needle. Sew neckband seam allowance down and hem. Sew sleeve hems (if not cuffed)


I used a jersey 70 needle and regular sew-all thread. The seams were sewn with a 1.5 x 1.5 mm zigzag stitch before finishing the edges with rainbow thread on my overlocker. I know I could just sew the whole thing up on the overlocker, but I prefer things this way – I’m having trouble getting my machine to perform an acceptable 4-thread stitch and I don’t trust the 3-thread to be strong enough on the seams. (I will take it in for servicing one day… and I have finally got that ball rolling; I’ve taken my beloved Elna Grasshopper in to Tony’s Sewing Centre In Tufnell Park to see if anything can be done about the disconcerting smoke that comes out of the motor after about an hour. You can read about that drama here if you missed it!)

So having thought I’d learnt my lesson when I made these Tshirts, I actually attempted a little maths before cutting and attaching the neckband. My 10cm strip stretched to 14cm… that’s 40% stretch… I measured round the neckline and asked Alexa to subtract 40% from my total neckline length. This meant cutting a 30cm neckband for a 50cm hole… it seemed a bit extreme, so I added a couple of centimetres back as well as the seam allowances before cutting it out. Folded and pressed, I basted the band in place with a long straight stitch, then I press it to check it fits (thankfully this one does!) Once I’m happy it fits, I sew it on with a zigzag stitch, then finish the raw edges. Later on I do all the twin-needle stitching in one go.
I wanted the cuffs to be 1.5cm deep, so I removed 1.5cm from the bottom of the sleeve pattern to make sure they finished up the right length. To give the cuffs a little snap (but without making them tight) I cut them 2cm shorter than the sleeve. Apart from the basting, these get sewn on the same as the neckband; zigzagged, overlocked then twin-needled at the end.

I find it really satisfying sewing in jersey sleeves. With just three pins I take my time to align the seam allowances as I go and sew really slowly around, stopping regularly to check the fabric is sitting smoothly underneath. While I sew, I have the sleeve underneath and the body of the shirt on top: this way I find I can keep a keen eye out for bumps and puckers along the way.
Once I’ve sewn up the sides, I do this funny little fold to the inside corners of the seam allowances at the cuff – I fold the corners of the seam allowance in at 90° then finish the seams. Feed the thread ends back through the stitching using a big eyed needle, and it should keep your seams from showing through. Right at the end, the twin needle goes on and I stitch the hem, sleeve cuffs and neckband.

Late one night I bought a pretty hefty consignment of cotton jersey fabric online. I only got plain colours, but the quality feels good. For the Strong Man Tshirt I used the pattern from Mens Clothes For All Seasons (my go-to Japanese pattern book) and I decided to trace out the Raglan Tshirt pattern to make some more, for me this time! This is still in keeping with my plan to only sew things I need in my wardrobe. I only have a few me-made Tshirts, and some plain-ish basics will really help me out. I’ve a few old ready-to-wear Thsirts left over from before I started sewing, but they really are clinging on by a thread now!

You’ll have to wait to see me in my new Tshirts, but here’s a snapshot of MrA in his. We were out at the Punch & Judy in Covent Garden, enjoying the beer terrace and the view of the street entertainers below in the square…

Until next time,
Happy Sewing!
Notes to self:
- Follow the maths for the neckbands!
- Ask Alexa to help you and don’t be afraid if you end up cutting a band more than 10cm shorter than the neck!
- Make more things for MrA, It makes him happy, it makes me happy!
- Save up for a coverstitch machine – you know you want one!
That fabric is terrific and the Mr. looks delighted in his new shirt! When I sewed my first knit top I searched EVERYWHERE to try and figure out which direction to press the sleeve/shoulder seam – no dice. At some point I decided I preferred pressing it away from the sleeve, and here it is! Written down & official! 😀
Thank you! 🤣 I don’t know how official it is, but that’s how I like it! 🤣👍🙏
Fantastic stitching!
Agree that Juki make awesome machines, I adore both my coverstitch and overlocker.
With the neck band – I’ve taken to sewing up only one shoulder seam. Then adding the band which is cut to around 90% of the neck. I stretch it to fit and sit nicely, sew it in and then I sew up the other shoulder seam, including the neck band. THere is sometimes some excess band fabri, but that is taken out by the overlocker when sewing up the shoulder seam.
This way is similar to some RTW tops and usually works first time.
Hi, thank you!
I tried that technique (admittedly only once!) and wasn’t keen- I felt like I had even less control!! But I guess that’s what practice is for! 👍🙏
I love this tee shirt and isn’t it nice when our loved ones are thrilled with what we make them? Mr A looks exceptionally fine in this beautiful make.
Thank you! I don’t make for him often, but can’t ignore a direct request!
I love this fabric! Who is the designer or manufacturer? It’s terrific. Beautiful workmanship as always. Consider a Juki model 1500, easy to thread as far as cover stitch machines go. Produces a beautiful stitch.
Hi, thanks for the tip, I’ll look into the juki.
I’m not sure on the fabric designer… I’ll dig the scraps out and check when I get a chance. 👍
Yay for making other people happy with things you’ve made! 🙌🏻 Such a cool print 😍 I haven’t blogged about mine yet (it’s in the works) but I bought a coverstitch a while back. Honestly, it’s worth every penny 🤑 there was, shall we say, an ‘adjustment period’ of me getting the damn thing to sew properly, but I think I’m getting there now and the finish does look 👌🏻 Go on… treat yo’ self 😬
The next significant purchase will be either a coverstitch machine or a dyson hairdryer! … work or play/ head or heart! … it’s like Kramer vs Kramer 🤣
Great looking T shirts and a useful summer item, the twin needle finish looks great, I must try and do that as my machine has twin needle setting. I had Brother 1034 which caused problems with 4th looper not sewing four stitches, in temper threw it out and bought a different make, really though should have got it repaired I suppose but got an offer on a Viking at time. Hope you get it sorted.
Hi, yes, give it a go: twin needling is great!
Tony’s isn’t proving to have the fastest turnaround so we’ll see which comes first… a repair or a new machine!!
Can’t believe you were in Bristol, I live in Bristol, and yes Like Sew Amazing is a great little shop! Sarah used to run little pop up shops, but it’s lovely to have her permanent. Great T shirt too. Susie x
Hi Susie, lucky you, Bristol’s great! My brother & sister in law are always showing us properties to buy when we visit!