
Hello Sewists
I hope you are doing well. I’m feeling great as I’ve managed to tick a big sewing-goal box recently; I’ve made not one, but five t-shirts! Three for myself* and two for MrA. The weather has turned cold here in the UK but what we lack in air-conditioning, we make up for in central-heating, and these t-shirts are getting plenty of wear!
*then an extra one for me as I forgot to take progress shots of sewing the neckband!
If you ask me, I think sewing with jersey fabrics is much more fun than it’s widely believed to be. I guess it all depends on your fabric, but if you stick to well structured knit fabrics like T-shirt cottons and sweater knits (like French Terry… do you know him…? Lol) it’s really not very different from sewing with wovens. Some of the thicker jersey fabrics can even be sewn with a regular straight stitch (if there is not too much pressure put on the seams, ie; a wide neck-line, slouchy fit etc). With t-shirts however, even though they seem like the perfect quick-sew garment, they do come with a small sting in their tail… the neckband maths!
I’ve extensively researched (and even blogged about) neckbands before, but seldom take my own advice. Thankfully I can report that I believe I have exorcised that demon once and for all – and, even if I can’t remember the equation, I can at least remember to look it up! To help me remember, I have thrown away all neckband pattern pieces from my t-shirt pattern collection!
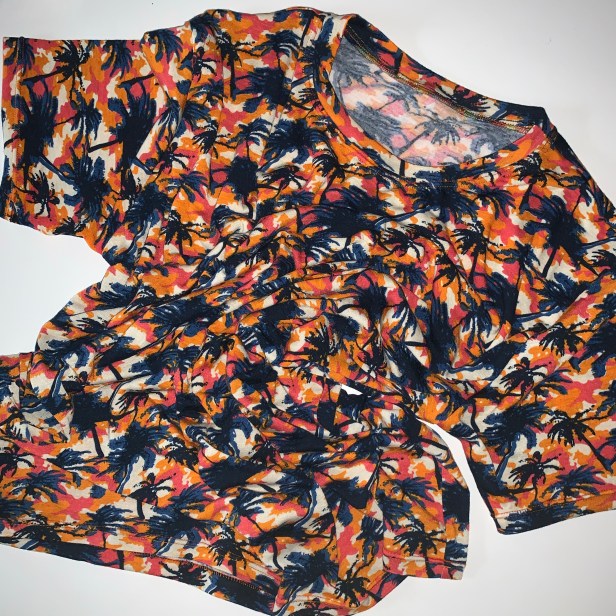
Preparing the neckband…
(This camo T-shirt was my ‘bonus’ shirt, made from the leftovers of the babygrow I made for my newest great-nephew…)

The trick, of course, is to measure each neckline separately and work out individual band lengths for each t-shirt. You’d think that using the same pattern for three (… four 🤭) of the shirts would mean I could measure only one neckband, but depending on the amount of stretch and drape (as well as the accuracy of your sewing!) the few millimetres or centimeters difference will have a huge effect on the outcome. I cut my neckbands 5 cm wide (inc 1cm seam allowance) and use this chart to determine the length…
If 10cm of fabric stretches…
Upto 13cm = cut the neckband at 85% of length (+ seam allowance).
Upto 14cm = 80% of length.
Upto 15cm = 75% of length.
16 – 18cm = 70% of length.

… so on this shirt, my 1/2 neckline is 27.5 and my stretch is upto 14cm which means I need to work out 80% of 27.5…
I ‘ask alexa’ to do the maths! It goes like this… I say; Alexa, what is 80% of 27.5? and she’ll tell me it’s 22. Then I say ‘thank you’ even though she’s stopped listening (… does she ever stop listening???) So I measure 22cm out from the fold of the fabric, then another 1cm for seam allowance.
Once I’ve cut the band to the correct length, I sew the short ends, press the seams open then fold and press the band along the length, wrong sides together. If it doesn’t hold the crease well, I’ll baste the raw edges together too. Then I put a pin in the quarter marks.

You’ll need to pin the quarters around the neckline too. I like to put the neckband seam on the left shoulder seam, so it is necessary to mark the quarters from that point. I pinch the seam together and ‘walk’ the two sides of the neckline together until I reach the opposite side (this is usually an inch or two in-front of the right shoulder seam) and put a pin in the half-mark. Then I hold the pins together to find the quarter-marks, and pin them.

Match up the pins on the band to the pins on the neckline… don’t trust it, it’s not an exact science, so visually check that the ease is evenly distributed and adjust the pins if necessary.

Basting & sewing the neckband.
With just the four pins in place, I baste the band on with a long straight stitch, in the middle of the seam allowance (5mm). I go slow and stop to check regularly; keeping an even tension… gently stretching the band not the neckline… maintaining alignment at the edges. I baste it with the band underneath, so I can see the easing better. But when I sew it I keep the band on top to have more control over keeping the band width even.

With the basting in, I sew it properly with the ‘lightning’ stitch, finish the seams on the overlocker (optional!) and topstitch down with a twin needle (after a good press!). If I’m feeling really pious, I might unpick the basting… but often I just leave it in there… and try to not panic when I inevitably hear a pop from the stitching one day!

Don’t get me wrong, they all sit nice and flat, but the yellow one really came out best of the bunch! (Note: a slightly slinkier fabric with a bit more stretch than the others)


We’d bought one of MrA’s fabrics for last summer and I never got around to making it, so he was thrilled to finally end up with two. I on the other hand have long needed a few new t-shirts but had ‘no fabric’. I made it a mini-mission to purchase some suitable t-shirt material…
People often ask me where I buy my fabric. I do get a large percentage of it online, but also, like many of you I’m sure, I try to never miss an opportunity to visit a fabric store in any town/ city or country we may be visiting. Obviously, that kind of behaviour has been on hold for some time now but this selection was collected at various times from Truro, Bristol & St Ives on family visits. In fact, Sam, one of my extended family has opened a fabric and wool shop in St Ives, it’s where I got the yellow fabric. It’s a beautiful little shop so do visit her if you ever get the chance to go to Cornwall!

The first one I made was camouflage fabric too, but extra cool as it has airplanes hidden in it! I made this one solely on ‘Big Red’ (‘my’ Creative 1.5 – on loan from Pfaff) I wanted to try out the overlocking stitches and wasn’t disappointed. I stitched and edged the shoulders in one go using stitch #20. I used the stretch stitch #17 on the sleeves first then finished with edge stitch #22. I basted the neckline with a 5mm straight stitch first, then sewed it the same as the sleeves.

After proving itself on the first t-shirt, I will admit to switching back to my overlocker to finish the seams on the rest of them. I continued to use the stretch stitch for construction and the twin needle on the hems, but I do love to see my ‘rainbow seams’ on the insides!


It’s needless to say that the IDT system really came in to play with these t-shirts. A lot has been said about the ease of clicking it into place. But the thing I like most about it is that it doesn’t make a sound! My old (unbranded) walking foot sounded like a vintage steam train had come off its tracks and was hurtling straight towards you! Thankfully, I don’t get any of that with the IDT!

It was a bit chilly, but MrA & I ran out to the courtyard to take a few snaps…

I’m so pleased I’ve made these T-shirts… MrA is especially pleased as I’m always stealing his! And I’ve got to thank Pfaff for lending me the machine, it’s really given my ‘sewjo’ a boost! It looks like the world is going to be upside down for some time so there’s no point waiting for ‘normal’ – it’s time to get on with the things we can control and exercise that creativity!
Wishing you good health & happy sewing!
Andrew x
Notes to self;
- MEASURE EACH NECKBAND INDIVIDUALLY!
- Don’t put off making t-shirts ‘just because they’re quick’ (if you know what I mean!)
- Get back in touch with French Terry!
I recently upgraded to a used Pfaff Expression 2.0 from my prehistoric machine and I fell in love with the IDT when I made a t-shirt recently! I had to do some sewing surgery to correct the shoulder fit and therefore redo the armholes. Your advice on the neckband could have really come in handy :'( I had to redo the neckband TWICE!! I’m a relatively new sewer and I learned a lot from my t-shirt mistakes, but I really appreciate you blog and I’ll be sure to check out before my next sewing project form some advice!
Hi, thanks so much for reading! Hopefully you’ll find a few helpful tips 🤞 good luck with your new machine!
I can’t decide which t-shirt I like best.
It’s the aeroplane camouflage for me!
I make a lot of t shirts too. I have a handicapped daughter who needs such things but I only turn under the knit fabric and then put a stretchy lace over it and sew. I may aspire to making it better thanks to your post. thanks.
Hi, this is such a helpful post, especially that neckband math! I’ve also gone and bought some of that rainbow thread – gorgeous! First time I’ve seen that! 🙂
What pattern do you use for these tee shirts?
Hi thanks! Glad it helped! And I’m always pleased to hear there’s another convert to rainbow thread!
My pattern is from Ottobre magazine and MrA’s is from La Maison Victor magazine 👍
I got my “Happy Thread” for the serger!! MaxiLock Swirls in Turquoise Blue!! Also got some pastel rainbow to try also. Cannot wait to try them out!! Such a wonderful thing to have “my special joyous thread” to serge with- and gain sewing room space by not having a huge collection of serger thread colors.
Fantastic! I hadn’t thought of the space saving benefits too! 😅👍
Great t-shirts. Your neckband instructions are gold. I usually wing it, and, um…
I covet that rainbow thread. Where did you get yours?
Thank you! I figured as T-shirts are ‘relatively easy’, I could dry to make the fiddly bit easier too 🤞
I got a big order of rainbow thread a while ago from Amazon (there’s a link in my ‘marketplace’ if it still works?) – but search for ‘variegated overlocker/serger thread’ and you should find some 👍🌈🙏
What great helpful hints! I still can’t see myself making a t-shirt, but I’ll be sure to revisit this post if I do. I’m getting ever closer….I ordered some sweater knit recently. Baby steps!
I saw that sweater knit on your IG! That’s a big step! Looking forward to seeing how you get on 👍👏🙏 – the best tip I ever heard about sewing with knit was from Thread-Theory: always start with the needle down in the fabric to help prevent thread nests & dragging the fabric through the plate 👍👏🤞
Thanks for the excellent neckband tips. I sew t-shirts infrequently but I usually just overlock the band on in one operation. Yours look much smarter!
The camo fabric IS pretty cool with planes – Hurricanes?
Now I’ve got my technique down, I probably won’t make another for ages 😅
Yes, the planes get washed & dried as soon as I take it off! 😁👍
Hi, thanks for all the great advice. I am now on my third Pfaff, a 720. They are great machines and the idt system is brilliant. Although I am primarily a textile artist I started to make clothes again this year and your blogs are a source of great inspiration
Hi Colin, thank you! I hope you enjoy getting back into garment making! 👍🙏
The rainbow serging is your signature! What a brilliant idea to measure each neck opening.
Hope the tips help 🤞👍 Haha, thanks, I do love my rainbow seams! 🌈🧵
Wow, you have been busy, new machines do give extra encouragement and these look very good. Thanks for the neckline information, I must try and save this as it is so often my downfall sewing stretch t shirt necklines along with the v neck, have ruined several attempts.
Thanks Bill, yes it’s nice to have an (un) healthy distraction! Hope the tips help 👍. I’ve only seen a couple of v necks, tricky business!