
Hello Sewists,
There’s a job I’d been putting off for some time… I really need some plain long sleeve T-shirts in my wardrobe, easy garments to layer up or lounge around in. Not the most exciting sew I’ll grant you – that’s probably why I’ve put it off for so long – but now was the time to do it.
MrA & I have been busying ourselves tidying up the apartment, I’ve noticed that I keep reaching for his tops and T-shirts to hang around the house in – and you can bet your life, if I’ve noticed it, he’s noticed it too! It was obvious that making one T-shirt or one sweater was not going to be enough; If I was going to fix this thing, I was going to have to roll my sleeves up! I had a couple of hours to myself (as MrA was safely tucked up on the sofa watching ‘French Collection’) and I had three lengths of light to mid weight cotton jersey… It was time to open the factory!
As I made them I developed quite a smooth way of working. This proved really helpful when my Cousin in Law MissM asked if I could make masks for the family…

I got less photos of that session, but the process should work with any amount from three to … infinity…? (… you’d have to change thread at some point!) So although I’m far from the oracle on this, I thought I’d share with you my…
Five ‘Rules’ of Batch Sewing.
Rule1
Have a run through first.
This first (and in my experience) golden rule should be ignored at your peril! I would only omit a trial run if I was repeating a pattern I knew well that I also knew fitted me correctly, out of a fabric type that I’d had success with previously – not either one of those … ALL of them! If it’s a simple pattern like this sweater I’m using then I’d consider the first one a ‘wearable muslin’ (for want of a better term) .
I often won’t make a trial run if I’m only planning one garment from the project. But when you’re batch sewing, the last thing you want is 10 ill fitting pants/ sweaters/ shirts so it’s worth the time – just put together the basics for size if you’re familiar with the techniques, or practice the techniques on swatches if you’re unsure of the details.
A sneaky way around this if you’re feeling pretty confident is to select one sub-project to be the Scout. Choose your least favourite fabric for this one as it’ll be the one most likely to get screwed up! – the way to do it is, sew your Scout project as far as you feel comfortable, then batch the rest to catch up with it… just don’t wind up in a pickle.
Rule 2
Use fabrics of matching colours and weights so that you don’t have to change your needle or thread.
As I always keep my overlocker loaded up with rainbow thread, I don’t need to worry about changing colours on that. If this is an issue for you, you’re going to have to sew ‘all the blue things’ in one go and ‘all the yellow things’ on another go… if that won’t work, maybe batch sewing isn’t for you? In this session I only had to change threads for the twin needle stitching at the end, which actually gave me a nice moment of pause as I approached the finish line… I’m pretty pleased with how my twin-needling came out…
Rule 3
Don’t mix the pieces up.
Try to keep your sub-project pieces together. If it’s a small project (like masks) I’ll keep the piles around me on the sewing table. If it’s bigger projects like these sweaters, I give each sub-project a seat in the room and only have the pieces I need with me on the table – when I’m laying them out I put them in the order that I’ll use them in too – once I’ve finished with it, it goes back to its seat.
This works for me so far, but we all work differently – find what works to keep you from mixing the pieces up.
Rule 4
Do as much as you can before you switch tasks.
ie: If you’ve got to get up to press a seam, get all the same seams sewn on each of the sub-projects before you then press them all. Also think about sewing as many seams as you can before moving to the ironing board (you might be able to get away with finger pressing a seam allowance to sew over it and than catch the rest of the seam with the iron later on… think it through)

Rule 5
Take your time.
Something to keep in mind is that it should still be fun. It’s probably not best to batch sew if you’re up against a deadline – batch sewing doesn’t have to be speed sewing – This will naturally be quicker than completing individual projects, so there’s no need to rush! I remember one Christmas I tried to make six dresses at once and I absolutely hated it! It was just too big a pile of fabric to look like I could tackle it, and I had pieces everywhere… I was frantic! – T-shirts and sweaters are a good thing to batch make, as there aren’t too many pieces or processes to the sew – there’s nothing more daunting than having just finished a tricky bit of sewing than to have to do it five more times!

Putting it into practice.
So, it may not be the biggest batch in the world, but here’s how I took my own advice and made three new tops in two hours (normally 1hour each)
I’m using the hoodie pattern from Patrons Les BG (without the hood) to make long sleeved T-shirts – I’ve made the hoodie version and wear it all the time. I already know it’s a good fit, but before I made my ‘batch’ I sewed the shoulders of my Scout Garment so I could trial the size and fit of the neckband (I took 2cm off the pattern piece). With this done I could knuckle down and make more. Here’s the order I did it in…
(Apologies that there are no progress shots, in the spirit of the project, I just got on with it!)
First, I cut everything out, then, to make it easier later, I press the cuffs, hems and neckbands to mark the fold. Then it’s time for the overlocking/ serging.
- shoulder seams – pinned and then sewn.
- collars, stitched, turned and quartered, pinned and sewn into the necklines…
- sleeves sewn in…
- sides sewn up…
- Cuffs and hems overlocked

Then it’s over to the sewing machine, twin needle installed (so an extra bobbin of thread on the top spool holder) and I sew the neckline, (pre pressed) cuffs and hem, change threads and then finish the other one.

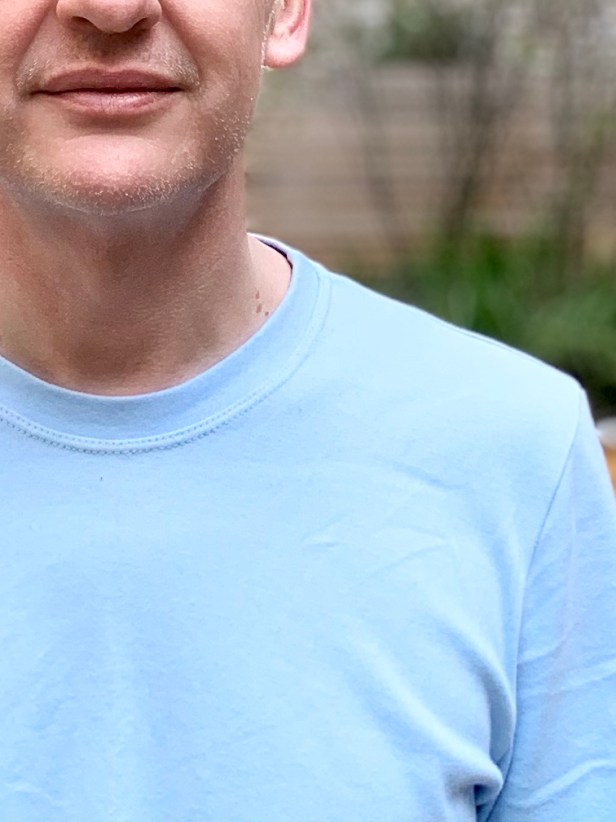
And hey presto, I’ve got three new tops! Perfect for layering under a sweater or shirt, also ideal for lounging around in… and MrA can have his T-shirts back!

There aren’t many opportunities for photo shoots these days (were there ever?) but MrA kindly took a couple of snaps in the garden for me. I love the shape and fit of this pattern, the only adjustment I made was to shorten the neckband, everything else is as-it-comes.

I hope you find these tips useful. I’ll admit, it was much more satisfying when I made the masks; it felt much more like I was getting into the spirit of batch-sewing – and it was great to go through and use up so many leftover pieces of fabric.

Until next time,
Keep safe, keep sane, keep sewing!
Andrew
Notes to self:
- Does it really count as batch sewing if you’re only making two at once…? ( I guess it’s too late to worry about that now!)
- Test all your stitch settings on mock-up seams before you start.
- Make sure all your jersey/ fabric has roughly the same stretch & weight.
Beautiful.
I have been so resistant about batch sewing whenever my previous sewing group suggested using this method. I am not sure why. With your post I have finally seen the light after so many years of being stubborn. I have lots of T-shirt fabrics, some of the exact same fabric in different colors which I can sew up using this method.
Thanks for allowing me to see finally how useful it is to batch sew.
Hi Kathleen, I’m so glad it helped! Hope you’ve made a start on those Tees now!
Another fabulous post! I’m the person that finishes up with pieces everywhere, including blown on the floor, never to be found again! Your new tees are great, perfect fit!
I can imagine you sewing outside as a gust of wind comes by!
Thanks they’re getting a lot of wear!
👍🏻🙏🏻😘
Great fitting jumpers, and they look as good as store bought with the rainbow tread. This french pattern company seams to make well fiting clothing for you. I am amazed at how well they fit you. You last 2 makes the pants and this are just terrific. You look so lean and trim in their clothing. Maybe patron bg will be your goto company for all your clothing makes?
Thank you. This pattern has definitely made it onto my favourites list!
Fabulous job as usual Andrew! Also depressing to see your perfectly coiffed hair in these times, lol…
I’m in New York, so it will be a LONG time until my hair goddess reopens. Any tips on trimming? (I seem to recall a quick fix for trimming long hair by yourself.) Gee. I wonder why I’m asking the sewing guy? (Next I’ll be asking for tap advice lololol…)
Haha… sewing, hair, tap… gotta keep busy!
Best tip for trimming long hair… Don’t 🤣! Us hairdressers are going to be desperate to get back to work when we can! 🙏🏻👍🏻
Stay safe 😊
Good advice. Believe me, whatever I would do would definitely need to be repaired 😱! I think the lines to hairdressers are going to be LONG, so sharpen those scissors!
My SIL is a hairdresser in Nashville and kept it up scary-long. Apparently t’s hard to stop when you’re a wizard with scissors! (And anticipating the lack of income.) Maybe we should all buy stock in future cuts…
Maybe your hairdresser sells vouchers? Your SIL could toi to help bridge the gap?
It’s so frustrating as I LOVE my job!
Love this!!!! Can you please tell me what brand of rainbow thread you used? I need to do this!!!!! I think i would even serge this on the outside seams!!!! 🧵❤️
Hi, I had a link in my ‘amazon storefront’ but I think they’re out of stock, you could use the link to search for similar items…? 👍🏻🤞🏻
Love this! I’ve been meaning to do the same thing – even bought my twin needle. Maybe it’s time to jump on the t-shirt bandwagon 🙂
Go for it, you won’t be sorry! 👍🏻👏🏻
…and for when times return to normal, batch sewing with a buddy or in a group makes it a lot of fun 🙂
Sounds like my kind of party! 🥳👍🏻
Hi Andrew, your tops look fantastic, inside and out! Do you have an easy pattern for the facemasks, or a link to it please?
Hi, thanks! It’s the ‘Olson’ pattern – with a little tweak to the curve…
https://www.regmedctr.org/webres/File/OlsonMask_wPattern_v3-USE%20THIS%20ONE.pdf
I am LOVING those rainbow seams!! I still need to get me some of that rainbow thread… 🌈
You should! They make me smile every time I see them!