
Hey Sewists,
Well, it’s been lurking in the shadows for some time now and today is the day it finally sees the light! It’s the needle case tutorial!
(Broken wrist update for those who are interested… it’s on the up, I hadn’t realised how long it would take to build up the strength and mobility, but I’m getting there. The pain is easing a bit every day and I’m itching to get back at the sewing machine any day now! Annoyingly I think it’s still going to be a week or so before I can get back to work properly.)
I’ve been dismissive of this handy little sewing helper in the past. I suppose I just wish it looked a bit cooler! But the reality of it is that it’s gaudiness is exactly what makes it so useful. Picture the scene…
It’s the 11th hour, you’re up to your elbows in sewing and no one’s getting fed tonight… you break a needle… where are your spares…??? Easy, they’re in that bright yellow beacon… it’s RIGHT THERE… You can’t miss it…!

So, I decided to make it after I posted a little video of the (much cooler looking but, ultimately harder to find in a crisis, prototype) on Instagram and although it by no means ‘broke the internet’ it did go down well! Maybe you’ve seen it… 😉…?
It suited the purpose but was hastily made. If I was going to share it with the world (😉) I’d need some photos. So I set to making the ultimate needle case! I raided my scraps and found a piece of felt I’d used to play with the stitches when I first bought my machine. It seemed perfect. I’d picked up a square of binca (… or is it Aida…?) from C&H by my mums at some point too.
Supplies:
1 x sheet Aida/ Binca
A couple of fabric scraps- use a stiffer fabric for the outside than the inside. (I used drill on the black one and felt on the yellow one)
Ruler
Snap fastner
Chalk/ marker
Fray glue
Scissors
Sewing kit
Here We Go…!
Keep cutting the Aida in half until you are happy with the size.

Check all the pieces are the same height and glue the top & bottom edges to prevent fraying.
Assemble two sets of pages. Mark the centre and stitch together.

Fold along the stitching line and neatly trim off the excess from the sides. Apply fray glue to the newly trimmed sides and allow to dry.

Check the finished measurements of the pages to draft the cover. Add seam allowance and cut a simple pattern piece, or draw the size directly onto the felt.

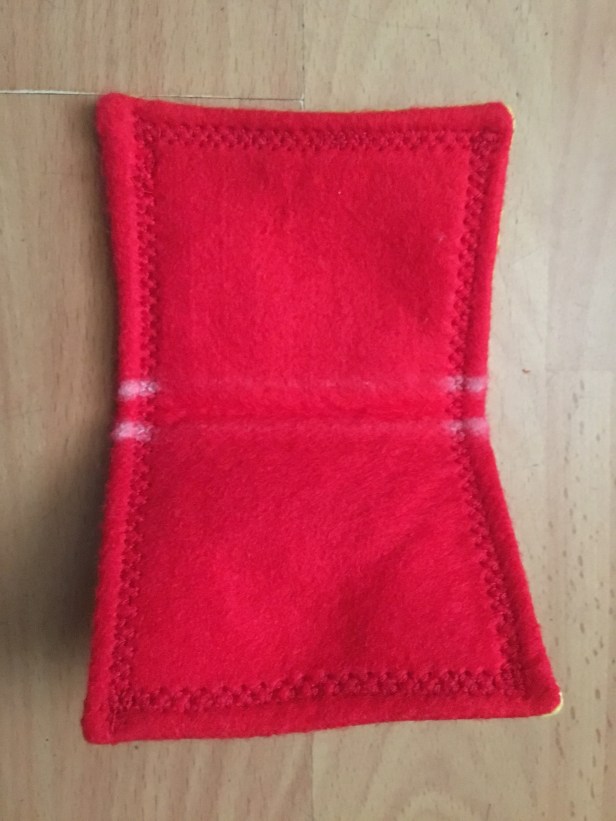
My felt already had the stitches in it, but now’s your chance to pimp it up! Use your machines stitches to decorate the felt. Either just decorate the size you need, or do the whole piece… you could use the leftovers for a matching pincushion…(I’ve got one!) If your machine doesn’t have many stitches, then you can be even more creative with stitch length, zigzag and intersecting lines. Or even give free motion stitching a go! ‘Pollock’ the hell out of it!
Cut out the outside and inside pieces for the cover. Sew with right sides together, leaving an opening for turning through.


Turn through, press and topstitch around the edge, closing up the gap as you go. (I couldn’t help but use another crazy stitch setting for this…)

Hold the pages inside the cover to check the placement of the sewing lines. Mark on the edge of the cover. ( you can just about see the chalk marks in the photo below…)

Following the placement markings, sew one then the other set of pages onto the spine along the previous stitching line.

My book is so fat it won’t close properly, so I made a strap and zigzagged it onto the back.

And attached a snap to the front.

To finish, mark each page with what type of needle it holds. For a quick fix, do this with a permanent marker…
However, if you really want to show it some love, you could hand embroider on each page… I’ll leave that up to you!


(That’s a lot of size 70’s!)


Cute huh? So I line them all up neatly and take one out at the beginning of a project. If I put it back, I place it at 90° to the fresh ones, so I’ll know next time. Cute… and foolproof!
Go ahead and treat yourself! Don’t be afraid to make it VISIBLE!!
Happy sewing!
Notes to self:
- It’s time to start sewing a few small projects.
- Im sticking to my stretching & exercise regime and feeling a bit of progress every day (… but, WOW, is it BORING!!!)
- I must organise my sewing plans… I’ve got SO MANY ideas flying around, I’m like a maniac! (… ‘like’ a maniac…!?)
- Although I’m sure I won’t make it to complete #sewingthescene again this year, I might just be able to get an entry in for #therefashioners by the end of October… we’ll see!
I want to make a few of these as travel mending kits for gifts. Everyone I know is always looking for a safety pin, or needle and thread or a button in their work totes or packs. This is a great gift idea that for more than sewing friends. Love it, it’s so charming and fun.
Thank you! That’s a great idea! I hope to see hundreds of them all over Instagram 😂! 😉👍
Such a clever idea! I love the yellow with the machine stitches on the outside. You can often find that Aida stuff in op shops (charity shops), I shall start keeping a look out!
Thank you! It’s a bit gaudy, but very useful! 👍🙏😉
I hope you continue to feel better, and it confused me a bit to see a different blog name–I wonder how long I’ve missed that one for!
Lol, only a couple of posts! It’s still me!
Thank you, getting better every day now 👍🤞🙏👏
I have bookmarked this for making mine!!! I think I’ll make mine a bit longer. At first I thought you hand embroidered!! ;o) I think I’ll just label the front of mine (forgetful me). I have plenty of felt! Too bad I gave away my Aida when my vision went bad. Bet there’s some at the dollar (pound) store!!!!!!
Genius – genius- genius! Thank You!
When is your book coming out?
p.s. great news on the wrist! Did your Mom ask you if you learned your lesson? ;o) I would have! LOL!
Haha, I’m learning my lesson more and more every day 😂 hopefully one day I’ll get it!
Grab that Aida and get Sewing! You won’t regret it! 😅😂👍🙏👏
So glad that you are on the mend. My friends and I look forward to your next great ideas. We are making Dining Scarfs for the elderly right now. They are nice enough for someone to wear to a fancy restaurant or a casual diner. But, we need some new projects to spread some cheer around for Christmas. Help us please, mend fast WE NEED YOU.
Aww that’s SO sweet, thank you! I’ve got a few Christmas ideas, I hope I get to make them in time! 👍🙏🤞👏😊
I’m glad your wrist is getting a little better. What a great little needle book! I’m afraid I’m with Sarah…at the moment my needles are in the original cases with a few used ones stuffed in a pin cushion that dangles from the tie back of my workroom curtain…
By the way…best line ever “Pollock the hell out of it!” 🙂
Haha most of my ‘art works’ are more Monet… lovely from a distance, a mess up close!! 😂😉👍
Love this!
I’ve seen needle books before and always think ‘I must make one…’ but never get around to it 🙈 currently I keep all my needles – in their plastic cases – in a little box on the windowsill next to my machine. This only hold new ones though… I’m ashamed to admit that I stab the half used ones into the anti-vibration mat that my machine sits on 😳🙄🤦🏻♀️ I know right. Every time I make a little accessory I too think that I should make more… then I get lured in by a fully lined, many-panelled coat or something 🤣
So glad to hear the wrist is on the mend – hang in there, the end is in sight!!
Thank you, it totally feels like a ‘break through’ day today! I’m definitely ‘on the mend’ ! 👍🙏👏😉😊
This is great & not likely to go missing. I’m sure I’ve got some bright felt lurking in the sewing cave closet. I’ll need to make up 2 one for hand needless & one for machine. I know there’s scrap x stitch fabric or more felt to use around as well. My Janome has over a hundred stitches & lettering the Singer close to 300. I should be able to make do with a few of them.
I’m so glad you’re improving. I know it’s difficult to wait, I had a complete knee replacement in April, do your therapy you’ll be rewarded in the long run.
You’ll continue to be in my thoughts & prayers.
Thank you! Yes, it’s SO much slower than you’d think isn’t it!
Enjoy using up all those stitches!
Nice tutorial but I’m going to go off on a tangent and make one for my hand needles. I found myself without a hand needle at sewing class last week and thought I should keep a “needle book” in my sewing box. Thanks for the push to make one!
Theresa in Tucson
It’s perfect for hand sewing needles too! Awesome! Enjoy! 👍🙏👏
Glad to know you are on the mend and will look forward to seeing the next lot of projects, you will no doubt be relieved to get back to a normal routine, all the best.
Thank you 🙏Yes, I’m looking forward to normal service being resumed!