
Hello Sewists,
Before I send my sewing machine away for a service (which will inevitably turn into a repair) I thought I’d see how I do using just a straight stitch machine. Of course, I still have my overlocker, but decided to leave it on the shelf for this make.
It was time to bring the Grasshopper out of the box! I LOVE this little workhorse of a machine. It is sheer beauty to my eye. Sadly, the poor old boy has spent a bit too long in the mess, chain smoking probably and has quite a terrific habit of billowing smoke from his gills if left on for over half a day. There is also a feint but eerie buzz that can only be heard when the plug is almost in the socket… if this blog suddenly goes dark and you don’t hear from me, please send an electrician along with the paramedics! (…don’t try this at home!)

Anyway… apart from the almost constant fear that the engine would seize up, dry up – or worse, blow up – it was a very satisfying sew. I’d previously bought a converter so that I could use my collection of snap on feet, but in reality I only used the regular sewing foot, the zip foot and my beloved plastic-open-toe foot.

Without the function to move the needle, the rest were not viable (stitch in the ditch foot, I’m talking to you!) or not necessary (ruffler…? Anyone…?!)

I thought I would miss using the automatic backstitch function on my modern machine, but the Elna has a lever to backstitch when you want to; and I enjoyed taking the time to pull visible threads to the inside to tie off by hand.

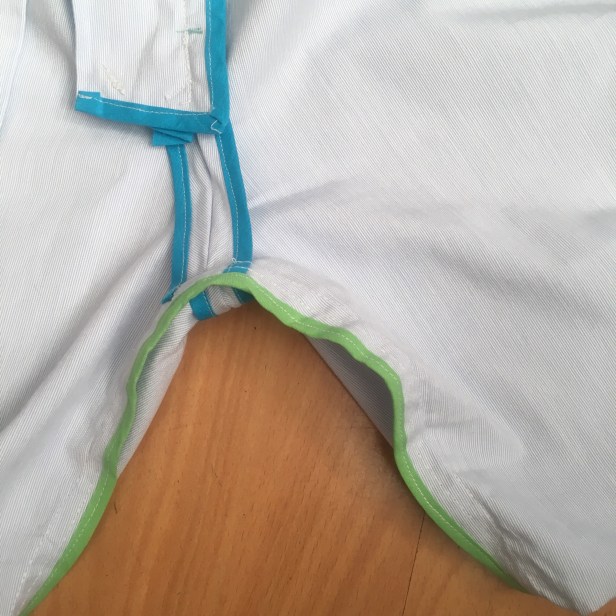
To finish the seams I found a length of ready made bias binding in one of my boxes, almost enough blue, then a little bit of green to finish it off! I just folded the binding over the raw seams and held it in place as I sewed it down. I’ve not used binding this way before and I’m really pleased with how quick and effective it is.

I French seamed the front pocket bags and attempted to flat fell the outside leg seams (folded on the inside and stitched from the outside… mostly successful!) and bound the back welt pocket seams.

In between the long seams, I switched off the machine for a cooling-off period which seemed to help. I’m still here at least…!

I would have liked to try my Singer buttonholer out on the Elna, but I really think that the next person to turn it on should be a reputable repair person. I’ve had the buttonholer for a while now, but not played with it since the initial tryout (which had mixed results) and this would have been the perfect project. Ah well, another time.
After the unsightly-hell-mouth that was my first (… and, so far, only…) hand sewn buttonhole I decided to suck it up and get my modern machine out. The buttonholes can get a little bit chewy on thick or bulky fabrics, but I took it super slow and practically hand guided the foot and the fabric through every 1/2mm stitch. It came out really well. Phew.

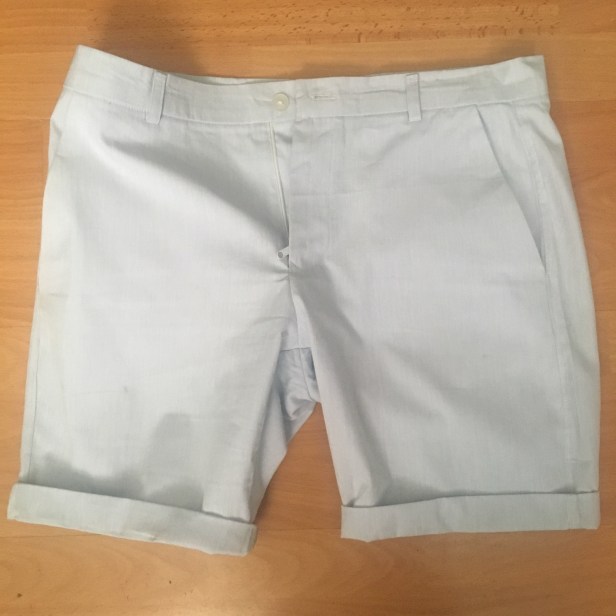
And I couldn’t be happier with these shorts. The fabric feels really light, but well structured and strong. (I double stitched the seat and crotch seams just to be on the safe side).
I suppose they’re a bit of a pigs-ear on the inside, but I love them! I’m pleased with the ‘straight stitch only’ exercise (although I caved at the end – I’ll put that down to health and safety) and the techniques I’ve practiced and learnt. And I got a great pair of shorts out of it too, perfect for the London heatwave!


Happy Sewing!
Notes to self:
- Not backstitching definitely makes my sewing neater.
- Always go REALLY slow on buttonholes.
- Maybe take the Elna for a service first…?!
- Time to make space for a back-up… who needs crockery, anyway?!
- I must find a way to get that vintage buttonholer out.
Those are gorgeous. i haven’t had time to follow your blog lately, and I feel the poorer for it.
Speaking of sergers… my Husky 935 is in the shop. I’m a terrible machine mom. She should’ve gotten a service and cleaning YEARS ago.
(… I’m ashamed to say I still haven’t taken either of them! … I have called the guy in the repair shop though!)
WOW that welt pocket is CRISP! My go-to men’s trouser pattern has a yoke and a patch back pocket…but this is making me want to shake up my repertoire.
Thank you! Yes, it’s good to mix it up from time to time! 👍🙏👏
Is that a knee lift I see? Epic little machine. Your shorts are just perfect and how nice does the bias look? Another brilliant sew!
Yes, it’s a knee lift! I wasn’t sure I’d get in with it at first, but I love it! Thank you! I’m enjoying my ‘binding-journey’!! 😂😊🙏👍
These look terrific! Seam details I think can as always add an upscale rtw look to anyone’s work. As always your thoughtful words in explaining everything definitely makes great reading. PS. Vintage machines are mainly what I use except for sergers
Thank you 🙏Yes I’m all about the bias at the moment, it seems! … I’d love to keep using the Elna, but better keep a bucket of sand nearby! 😅🤞🙏
These look SUPER profesh! Love that contrast binding.
I really do need to up my shorts/trousers game, I’m over here dithering over a pair of Safrans and you’re churning them out like nobody’s business 🤣
You are officially my inspiration 🙌🏻🙌🏻🙌🏻
😂 thank you! I am on a bit of a mission lately though, it’s this heat! 👍🙏☀️😄
Vintage machines certainly add that extra bit of spice to sewing! Personally I actually think a straight stitch machine has much neater, even straighter stitches 😀
Isn’t using bias binding the finish the seams called Hong Kong binding? or at the very least what you have done is a very basic version of that finishing technique….. *runs off to double check that* ;D
Fabulous shorts all ways round … is poor Mr A going to get a look in on your short making action at all??
Lainey x
I agree. If I can stop it catching fire I’ll use it all the time!
You’re right, I think for Hong Kong seams you sew it on in two stages, I’ve done that a bit, and it’s much neater… but this is much quicker 🤭😉
… He’s trying to get me to trace a pattern off his Tommy Hilfiger shorts – I’m trying to gear up to start, but I’m imagining a million toiles and finding it hard to get the motivation 😅😂 … I’d better do it before this heatwave breaks!
👍🙏😘
I love these shorts and this post! Your writing makes me feel like I’m behind your sewing machine!
Thank you, Wis, what a lovely thing to say 👍🙏😊
Well I think you should wear your shorts inside out so us sewists can drool over your sewing skills! Pigs Ear? Nope, It’s beautiful.
And right side out is to die for! Looks like upscale men’s wear- and it is!!
I can’t wait till my 6 foot, skinny bean pole, soon to be 14 yr old son can be fitted for gorgeous shorts like those! (boys are too much fun!)
Thank you! I’m really happy with them, feel great with just a tshirt, or a crisp linen shirt… hmm I must make a crisp linen shirt! 😂🙏😊
They look great! I visited London during a heat wave back when the London Eye was still on it’s side. The paper headline said “London’s Burning!”.
Haha! Never let it be said that we brits are not dramatic! It feels like that now too! ☀️👍🙏
I think the inside is great… secrets on the inside that only you know about .. and the insta community of course 🤣
Haha 😂 thank you! I can’t believe I’ve shown everyone inside my shorts 🤭😱🤣