Round at CousinA & CousinM’s over cards one night, CousinM mentioned that her favourite travel bag had bust a zip. Was it fixable?… now, I’ve seen many pictures online with this kind of theme…
Personally, I’m not adverse to the occasional spot of mending for a friend. I always think there’s something to learn in a repair. The last time I promised to take up a pair of silky trousers for a friend, I thought I’d learn how to handle silky trousers. What I really learnt was no job takes as long as procrastinating about it. She finally got them back.
I took the bag home and said if I couldn’t fix it, I’d make her a new one. This is the bag…
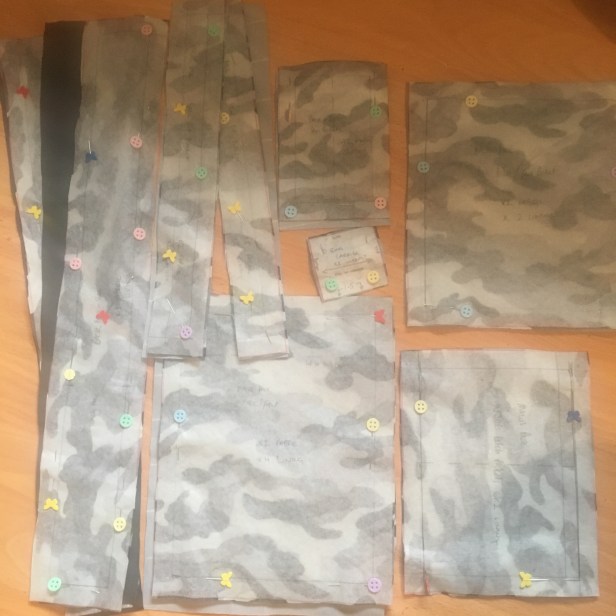
It’s like two bags back to back. One is deeper than the other. There’s a pouch pocket on each (1x zip, 1x Velcro). Penholders on one side. Inside pockets and D rings to hold the strap. I roughly measured it and started drawing the pieces out…
I always forget how many pieces you need to make even the smallest of bags interesting…
- Front outer x 2
- Front outer pocket x 2
- Front outer pocket lining x 2
- Front outer pocket zip x 2
- Inner lining x 4
- Inner pocket x 2
- Top zip x 2
- Top opening fabric x 2 (2 sizes)
- Top opening lining x 2 (2 sizes)
- Sides & bottom Fabric x 2 (2 sizes)
- Sides & bottom lining x 2 (2 sizes)
- Pen holder x 2
- Penholder lining x 2
- Tabs x 3
- Key holder x 1
- D rings x 2
I cut the outer from some nylon I had in my stash; I bought it really cheap ages ago & it’s gone into most of my bags somewhere or other. There’s probably about enough left for one more bag now, so it was money well spent.
The lining was another cheap find, a grey-scale camouflage pattern on a poly cotton twill. I’ve no idea what I thought I’d make with this but after 2 years I’ve still got at least a metre of it left!
On with the bag…
I made the two bags side by side. First I put together the base/sides. The larger bag has the pen carriers: I hemmed them, pleated them and stitched them down. Then I added the tabs and D rings…
Then I made the 2 sets of inside pockets (1 for each bag, and 1 plain) and the outside faces with the lined zip pocket (I decided to put a zip on both rather than velcro)…
Next I constructed the zips for the two main bags. I attached them to the base/sides piece to make a continuous loop…
Then it was time to put it all together. I made notches on the pattern (did I mention that?) to mark the top and bottom corners of the bag on the side pieces. I stitched each bag together at 1cm seams and finished the edge with bias binding. Then came the tricky part…
To put it all together…
- Put the bigger bag (inside out) on the table in front of you.
- Put the smaller bag inside the bigger bag so that right sides are facing.
- Pin the 2 lining pieces (back to back) on top, stitch all the way round & bias bind the edges.
If it all went well, you should be able to turn the bigger bag round and it’s all done. It took me a long while to work that out. And to be honest, the first time I thought I’d finished, I turned the big bag out only to find the small bag firmly fixed inside it, like a stubborn Russian-doll, refusing to come out. I huffed and puffed but the only way out of it was with the unpicker… so sure I was doing it properly, not only had I sewn up the bag, I’d reinforced the corners AND bound the edges. That’s a lot of unpicking! I’ll admit, I tore some of it out with my bare hands which was quite cathartic, but it looked a right pigs-ear by the time I’d finished unpicking. Thankfully, once I’d worked out the right order & sewn it together again, the binding covered up all the nasty business and it looks great!
And here it is next to the old one…
I don’t want to sound smug here (because it did take me ALL DAY!) but I’m really pleased with it. I haven’t seen CousinM yet and I’ve actually used it once or twice myself. She’s still going to get it, I promise… I just couldn’t help myself.
I’m glad I made a pattern!
Happy sewing!
Notes to self:
- Always make a pattern in case I want to make another.
- Don’t be cocky… BASTE then check. Preferably, Pin then check!
- Keep a small selection of D rings, key fobs, clips & webbing etc in stock.


that’s bag is brilliant! We’re going on a trip soon – I think I need to make one for everyone in the family – whether they like it or not!
So…. When do you start taking orders? Have to be purple for me please ;D
You crack me up!
Wow. That is quite the project! It looks great, and I’m sure your cousin will be thrilled!
Thank you! (… if she ever gets it!!) 🙄🙏
lovely post. Mending and recreating are just as wonderful as sewing.